DIY Goldfish crackers are a hit!

We are a non GMO home. I’ve been pretty vigilant in getting them out of our diets, and doing the research to understand why. (The “why” is a much bigger post.. someday) but.. as for me and my house, we are non GMO.

It’s getting harder to know what foods have them hidden inside. It’s usually safest to buy organic, but there is debate on whether anything is really organic anymore, because of wind moving pollen from GMO crops. But that’s another post.. I’ve recently learned that there is a push to hide the fact that a product is GMO in the codes.. or a deceptive happy sunshine label is another possibility. Whichever it will be, most people aren’t educated enough on GMOs. The public will continue to be the test subjects of corporations putting them in everything.

Phew… rant over…😤

My kids love goldfish crackers. I felt good buying the whole wheat crackers for a years. Then I learned they were made with GMOs a year ago. We went a whole year buying organic or safer brands. My autistic son really gets that GMOs are bad, so he uncharacteristically was ok with the change.

Enter DIY Goldfish! I ordered a little goldfish cutter on Amazon and found a recipe I liked.

They turned out awesome! Kid approved! Autism kid approved, in fact! I didn’t try them, because I’m vegan.. but definitely were a hit. Kids are asking me to make more. I think I’ll make a bigger batch next time, double it. The only time consuming thing is cutting them. I might just use a knife and cut squares😋.

______________________________________

DIY Goldfish Crackers

  • 1 cup – flour, whole wheat
  • 1/2 teaspoon – salt
  • 4 tablespoon – butter, unsalted
  • 1 cup – cheddar cheese, shredded
  • 3 tablespoon – water

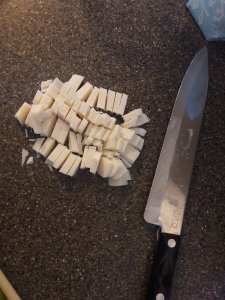
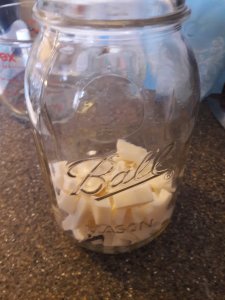
1. I used my Bosch. Mix flour, salt and chopped up cold butter, until it’s like sand.

2. Add shredded cheese, mix.

3. Add water a T. at a time until forms a dough.

4. Roll out between parchment paper farely thin. Thinner will be crisper, thicker more like a cookie.

5. Cut with a cutter or just use a knife to cut into squares and put in the freezer while your oven heats up.

350° for 12 to 18 minutes. Watch and take out at desired firmness.

I didn’t have any left to store, they were gobbled up. I have heard you can store them in a tin to last longer. Or reheat them if they get soft.

Serious money saver!

Best DIY Lavender Body Butter

Body butter. Sounds kind of weird, kind of like a cannibal condiment (ew).. but feels amazing on your skin. I have never used it until about 6 months ago. I had the opportunity to do henna at a pop up event, and the host gave out rad party gift bags. Body butter was one of the fun things inside. It was a mix of many types of butters. I tried it and was hooked!

If you’re new to body butter, it is made from plant based butters; Cocoa butter, Shea butter, mango butter. It is thicker than lotion and extra moisturizing. Body butters don’t quickly absorb into the skin like lotions. They are very good at treating skin conditions like eczema.

So I decided to make my own. I ordered some different butters off Amazon and starting playing with a body butter recipe to find the consistency I liked. Body butters can feel greasy if too much liquid oil is used. Here’s what I came up with and really like the outcome.

______________________________________

What you’ll need:

1/2 cup cocoa butter

1/2 cup Shea butter

1/2 cup coconut oil

Lavender essential oil (or your oil of choice) amount varies. I used about 20 drops.

Double boiler or a pot and smaller glass bowl.

Electric Mixer

1. Mix and melt butters and coconut oil in glass bowl or double boiler.

2. Take off heat and let sit a few minutes, then place in refrigerator for an hour or until set. You don’t want it to completely solidify, because you’re going to whip it up.

3. Whip till you have a fluffy consistency . Add your essential oils and whip in. Place in jars or containers of your choice. Usually whipped body butters are fluffy, but to avoid the greasiness, I used less oil. So this is a bit more firm when finished, than fluffy.

If you want more fluff, add more oil. I personally like this less greasy feel. So try it out and tell me what you think! Enjoy the luxury!

Namaste🌿

DIY Liquid Castille Soap. The easiest DIY you’ll ever do.

Since I learned about laurel sulfates and parabens and their dangerous risks, including endocrine disruption, protein breakdown, cancer.. to name a few… I’ve been looking for safe products, ways to de-toxify our home environment Here’s what I’ve learned.

Products, especially shampoos, are starting to be more available. But, they are not inexpensive. Enter Castille soap. The hippy staple for decades. Castille soap is so good, so pure, so versatile. You can use Castille soap in so many ways from hair and body, to laundry and scrubbing your sink. But Castille soap can be pricey, especially if you’re using it in so many ways.

I found an awesome DIY on Pinterest to turn Castille bar soap into liquid. It has saved me so much money, and it’s so incredibly easy that I had to share.

______________________________________

All you need:

1 bar of Castille soap (Kirk’s is pretty inexpensive)

1 mason jar

1 pot

2 3/4 C water

Knife

Boil the water. While it’s boiling chop up the soap.

Place it in the mason jar.

Poor the water in the jar. It’ll melt pretty quickly. Some bits take longer so let it sit for 20 minutes. Stir.

I forgot to take a picture till after I used most of it! 😂 it’ll make an almost full jar.

Use in all your normal liquid Castille soap ways. It’s a bit thin, but cleans perfectly. I use it in my homemade laundry soap, hand soap, dish soap… etc.. You can add essential oils of your choice.

Some DIY recipes are tricky. But this is a great one to cut your teeth on if your a newb.

It hasn’t been an easy transition for my autism kids. I use old shampoo bottles for shampoo and liquid soap. So far so good. I’m currently working on finding a way to get them to accept DIY toothpaste because I haven’t been able to find something without glycerin. (Glycerin prevents re-mineralizing toothpastes to do their job). I’ll post when I find an autism accepted recipe for my family😊.

Good luck! Let me know how you’re turns out.